6 STEPS TO CREATE A FACEBOOK BUSINESS PAGE
By Kaushik Shettigar

- 3rd June 2020
According to Statista, Facebook is the most popular social network worldwide. In the first quarter of 2020 alone, there were over 2.6 billion monthly active users of Facebook. Facebook is free. It is also one of the best mediums for communication. It lets you connect with friends and family and network with people across the globe. This platform is known for viral transmission of information. It is possible, simply through its sheer volume of users. Thus making Facebook an excellent platform to promote your business. This blog post will teach you how to create a Facebook Business Page in 5 simple steps.
Why create a Facebook Business Page?
Firstly, let us understand why you need a Facebook Business Page for your business, organization, or agency. People generally first look online when learning more about a particular business. Facebook provides you a golden opportunity to showcase your brand and advertise your products and services. It lets people learn about your business in terms of what you do, the services you provide, the products you sell, how you can be contacted, and where you are located. Through your Facebook business page, they can also see what other customers are saying about your business by reading reviews.
Facebook has several features to support your business. Using Facebook Ads, you can increase your brand’s visibility. You can specify who will see the ads based on factors such as location, age, and interests. Through Facebook Marketplace, you can buy or sell new and used items easily.
Creating a Facebook Business Page is one of the first steps you can take to market your brand on a digital platform. Let us learn how to do this, before we venture into trying all the services Facebook provides for businesses.
How to Create a Facebook Business Page?
STEP 1: SIGNUP/LOGIN
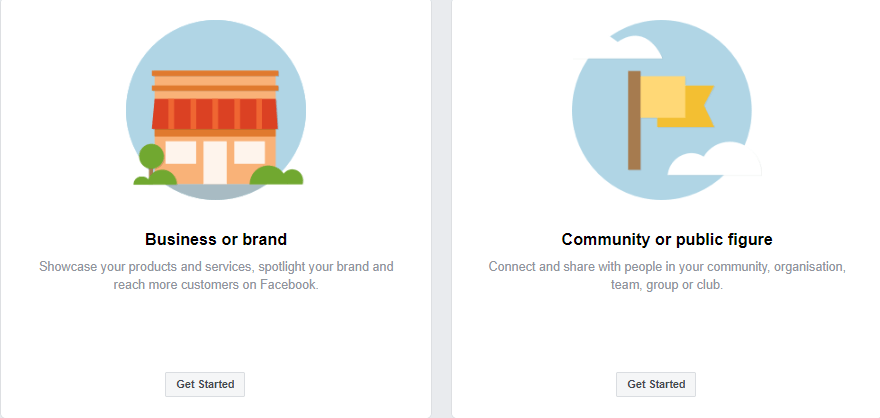
Firstly, to create a business page for your brand, you need to login to your personal Facebook account or create one if you do not have an account. Once you are logged in, navigate to ‘Create’ in the main window. As shown in the picture below, and click on Page. You can also click on this link facebook.com/pages/create

It will direct you to two page categories – ‘Business or Brand’ and ‘Community or Public Figure’. You need a business page, hence click on the Get Started button under the first option ‘Business or Brand’.
STEP 2: ENTER YOUR BUSINESS INFORMATION
It is now time to name your page and fill it with basic information such as type of business, address and contact number.

Choose a page name which reflects your brand. A good page name can attract more organic traffic. In the category option, select a field which best suits your business. Enter a word or two that describes your brand and Facebook will predict appropriate categories for you to choose from. You are limited to choosing only one category in this form. You can add more later. Fill in your address and contact if you would like to make your details public or you can hide them if you prefer.
When you are ready, you can click on Continue. Doing so indicates that you accept Facebook Pages, Groups and Events Policies. You can check them out before you proceed if you wish to.
STEP 3: ADD PICTURES
It is now time to add a profile picture. Please upload your brand’s logo or a picture which people can associate with your business. If you do not have a logo of your own, you can reach out to us at Market Bird. We will help you in branding your business at affordable prices. The Facebook profile picture will be cropped as a circle, so ensure that you do not put critical information in the corners of your image.

Once you have chosen a great picture, click on Upload a Profile Picture. Similarly, it will ask you to upload a cover photo. A cover photo is a large photo at the top of your page like a banner which can contain details about the services you offer or a picture of your team etc… Ensure that this image is visually appealing and showcases your brands identity. Both profile picture and cover photos are public and visible to anyone.

You also have the option of adding your profile picture and cover photo later. You can skip this step for now.
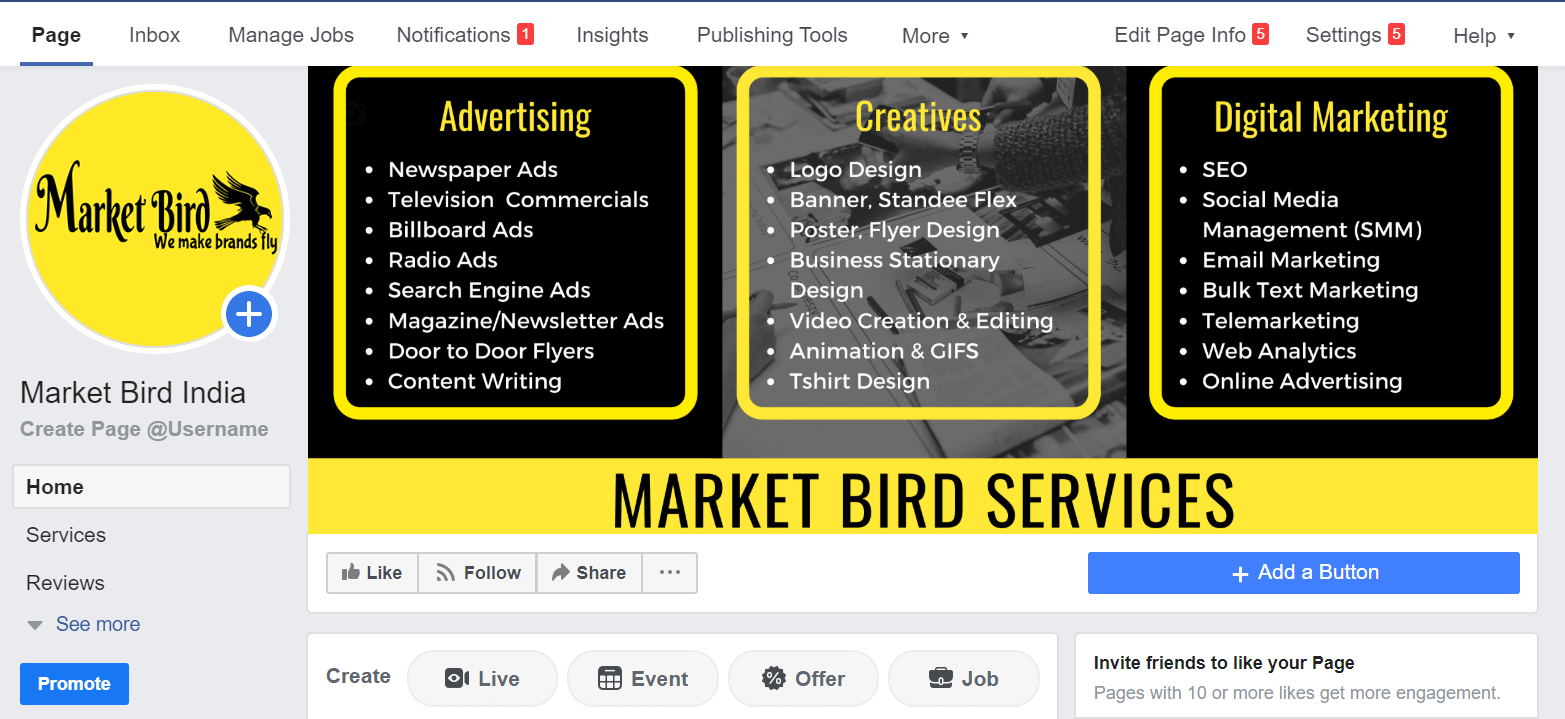
Congratulations. You have just created your very own Facebook business page. You can change your cover picture into a slideshow of images or you can put a cover video instead of an image
STEP 4: ADD A CALL TO ACTION (CTA) BUTTON
Before you decide to go off and personalise your page, by adding photos and videos, let’s add a call to action button. To do this, click on ‘Add a Button’. Depending on your business and the way you want your customers to interact with your business, you can create an appropriate button. You can create a button to accept appointment bookings, get signups to a newsletter or direct visitors to download an app or to visit your website or shop in your E-Commerce store. You can also use the button to encourage people to contact your business by email, WhatsApp or phone call.

STEP 5: PERSONALISE YOUR PAGE
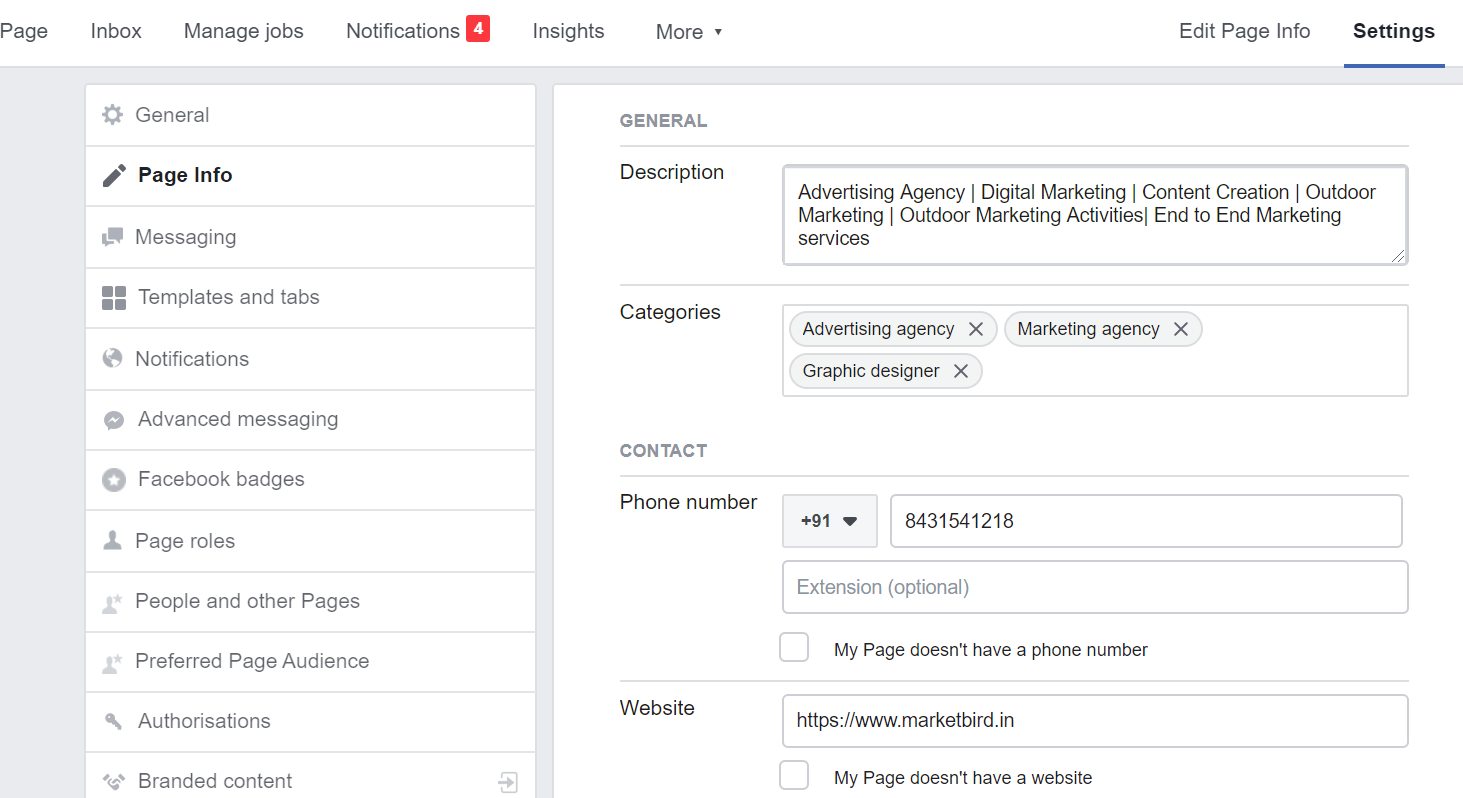
Now you can start personalising your business page. You can start with filling in your ‘About’ page and adding information about your products and services as shown below. I encourage you to fill in all the details. Providing detailed information of your business improves its credibility. There is a higher probability of people engaging with your business.

Click on the Edit Page Info Tab in the Main Menu and fill in all the necessary information. The Description Tab contains information which appears in Google Search Results. It should be just a couple of sentences and has a limit of 255 characters. In the Categories tab, you can add 2 more categories which reflect your business, in addition to the one you selected in Step 2. Add your contact details such as phone number, website link, location and opening hours.
STEP 6: INVITE FRIENDS
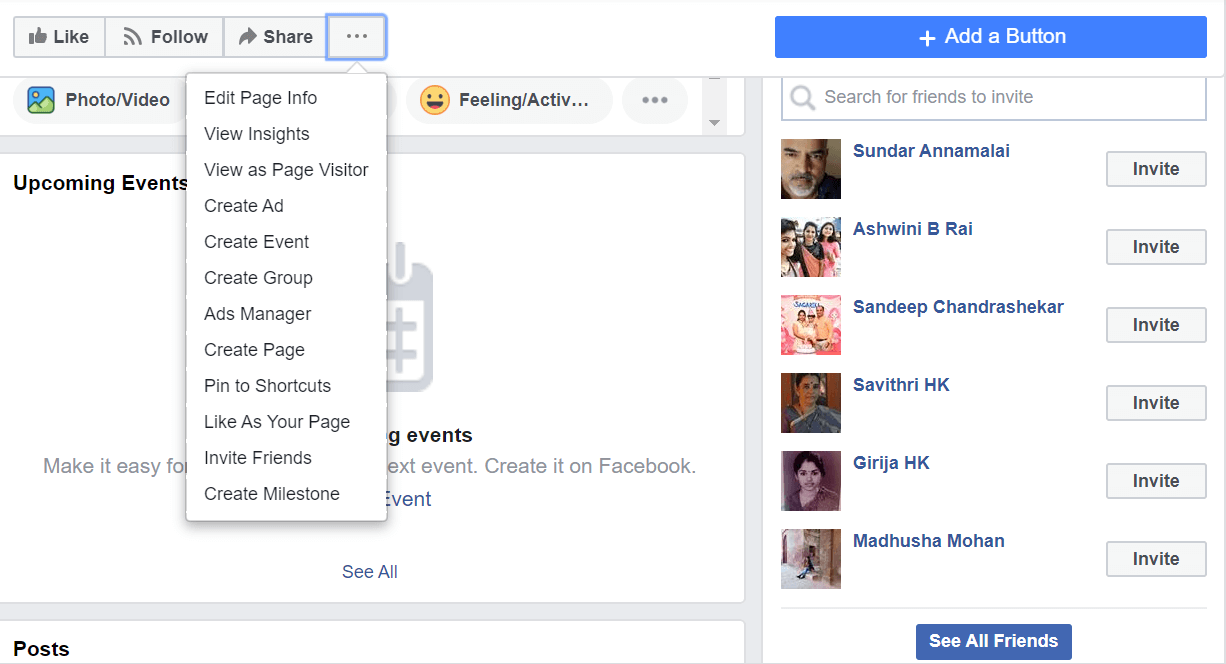
It is time now to invite your friends and well-wishers to like your new business page. Click on the 3 dots known officially as the meatball menu icon next to the Share button. Navigate to Invite Friends and send an invite from your page to them asking them to like and follow your business page or you can also invite them directly from the prompt shown on the right side of your screen.
You are all set now. You have created your very own Facebook business page. Here are some tips to grow and direct organic traffic to your business page.
- Be active on Facebook. Facebook is a very powerful tool. If utilized properly it can provide you clients from all over the globe and increase your brand visibility. Provide a quick response to messages, reviews, and comments received on your Facebook business page.
- You have to ensure that you are constantly delivering creative, eye-catching content through posts and stories. Make the audience feel that your business is worth reaching out to as an investor, customer, or well-wisher.
- Join different Facebook Groups and actively participate in them. Promote your page through comments on posts in groups.
